 I really like the handlebar mustache style because it reminds me of the Steampunk lifestyle. This type of lifestyle highlights 19th century science fiction. Not only does it provide you with a rebel pioneer type of image, it provides you with the look of a distinguished gentleman.
To learn how to shape a handlebar mustache like a pro, you will have to do the following. Let your mustache grow out without trimming it, apply wax as it lengthens and twist the ends with your fingers in an upward fashion.
For this next section, I am going to assume that you have a larger mustache that is ready to be shaped into a handlebar mustache. There are certain tools that you need in order to start yourself on your journey.
1. Ensure that you have a Wide Tooth Comb
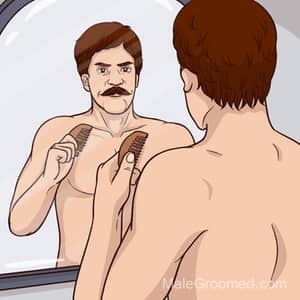
You need a comb that has wide-spaced teeth because a tiny tooth comb will get trapped in your whiskers since the whiskers are thicker than normal hair strands. Some people suggest using a bristle comb. I feel that a bristle comb is okay for a beard but it’s not okay for a mustache.
Essentially a mustache grows on the skin above your upper lip and that skin is very sensitive. I have tried personally this type of comb on my mustache and all that I succeeded in accomplishing was to cause soreness on the skin above my mouth.
If you really want to tread on the fancy side, you should purchase a wooden comb. It’ll go well with the Steampunk style. Click here to see the pricing on the Kent 87T comb that I recommend that is available on Amazon.
2. Training Your Mustache Using Your Comb
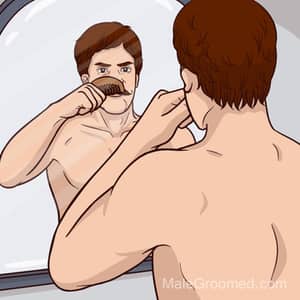
Now that you have the correct comb, it’s time to start learning how to comb your mustache. First of all, you need to ensure that you have thoroughly cleaned any food particles from your mustache. Also, avoid adding any creams or waxes at this point to your mustache. These substances will just clog up the spaces between the teeth of your comb.
Place the comb perpendicularly above the midpoint of your upper lip. This is where you’re going to part the sides of your mustache. With smooth gentle strokes, comb through your mustache.
This concludes the first phase of the training of your handlebar. You should perform this tactic twice-daily to train your mustache to flow to the sides so that the handlebar can be created…
3. Waxing of your Mustache – Warming the Wax
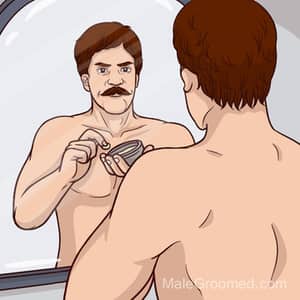 Now that you have adequately combed your mustache, you’re ready to apply some wax to it. The wax must be warmed beforehand so that it can be spread easily. There are three different methods that I will explain in order to increase the temperature of your wax. The wax that I recommend is by Honest Amish, to see pricing on Amazon, click here.
- Since most beard waxes are in tin containers that are small, simply place your container in your pocket a few hours before you are ready to apply the wax. This will increase the temperature of the wax closer to your body temperature which is in most cases, adequate for the wax application.
- Another method is to run hot water over the tin container in your bathroom sink for about 30 seconds. Try not to warm the wax for longer than 30 seconds because you don’t want the wax to turn into a soupy mess that’s going to burn your skin.
- If you’re pressed for time, this third method is the fastest to warm the wax. Simply use a hair dryer on its lowest setting and pass the hair dryer over the top of the tin in a back-and-forth motion ensuring that the hairdryer is 2 to 3 inches away from the tin.
4. Applying the Wax
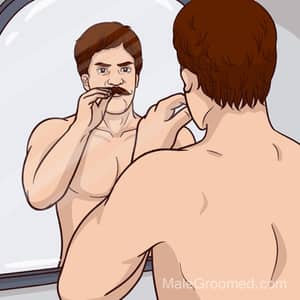 You’re now ready to apply some wax, which is actually a simple process.
Place a pea-sized amount of heated wax onto your thumb. Roll together your thumb and index finger. The wax will become softer and more pliable. You must perform this step with both hands at the same time since you will be waxing both sides of the mustache.
Now apply to wax your mustache starting at the area just below your nose. You’ll need to pinch the whispers together and to pull your thumb and forefinger to the end of the mustache. You have to perform this action on both sides of your mustache.
Ensure that you do not pull away at your whiskers because you could actually pull them out which is not a very pleasant thing to do!
5. Twisting the Ends
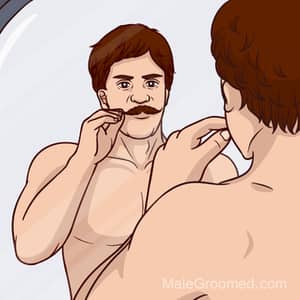 As you get to the ends of your mustache, use a twisting motion which is going to start the shaping of your handlebar. You may notice that you just have a couple of long weird strands at the sides of your mustache I’ll explain to you how to shape the ends.
Also, there is no need to wash out the wax while in the shower. Even after showering, some wax will remain that will help to hold your handlebars in place.
Importance of Using Mustache Beard Wax
In order to style your beard and mustache adequately you going to need something that’s going to provide some hold. Adding a beard wax to your mustache is the best solution. The reason why waxing provides a hold is that its base is made from beeswax.
Beeswax is it a very sticky substance and that is what provides it with a great holding property in a natural way.
When you add a beard wax that has beard’ beeswax in it as a base, right away this sticky substance is going to start taming your whiskers; even the wild whiskers that are inexplicably growing out in odd directions, perhaps even straight out from your face.
I checked out the ingredients in many beard waxes over the last week, and I noticed that a high percentage of them contain Shea butter. I had no idea why having butter in your beard would be beneficial, so I did further research.
It actually is a great ingredient to have; it moisturizes and creates a more healthy sheen to your beard or your mustache. Since my beard and mustache is salt and pepper in color, any kind of sparkle to it would please me immensely.
Train the Ends of the Mustache
Start at one side of your mustache and curl the long strands around your index finger if the strand is 2 to 3 inch long. You’ll notice that the whiskers are stick together and that a tiny circle will have been formed that has a closed loop.
Pinch the bottom of this loop and simply press together the remainder of the loop using a smearing motion with your thumb and forefinger.
If the strands of your mustache are rather short, just pinch each strand together and twist the ends into upward curls.
Now that you know how to shape your handlebar mustache, I will highlight some of the styles of handlebars that I find intriguing.
Super Brave with Stubble Look
This style requires that you have stubble growing on your chin and also a few inches above the chin area. This stubble will highlight your handlebar. If you have a beard, it’s probably best to shave it off. This is a great look to have if you like wearing large dark sunglasses
Extended Ends
To capture the extended ends style, you need to ensure that you have the longest strands possible. Nevertheless, you’re only going to form demi-circle curls that do not have closed loops. This is a great mustache style to use in combination with a white t-shirt and a jeans jacket.
Gray Beard with Handlebars
I have not decided if my gray beard is a genetic plus or a hindrance to my personal appearance. Nevertheless, something that I have noticed is that some men have a white beard but their mustache is salt and pepper in color.
Since you were probably considering turning your mustache into a handlebar because you’re reading this article, you are a perfect candidate if you have a gray beard and a slightly darker mustache.
Your mustache already stands out because of the difference in color. Your handlebars are going to take on a life of their own since they’re going to be extremely noticeable to others. What’s even better is that you probably have the tendency to have salt and pepper hair on your head, which would go well with your handlebars.
English Style
If you were the type of man that would like to go for the English style of handlebars, this is how to achieve it. This style requires that you grow your whiskers to a very long length on the sides so that you can easily pull whiskers to the side.
To have them stay in place, of course, you’re going to have to add beeswax. When you trim your mustache make the middle part narrower than the sides. This will create heaviness in your mustache. You can even shave the whiskers underneath the sides of your mustache.
You will need to lift up ends to do so. This will really enhance the look of your handlebars. It will seem as if your handlebars are floating in air since they will not be touching the sides of your face. Finally, simply shape the ends using wax, creating only slight curls at the tips.
Asymmetrical Handlebar
This type of handlebar has one side that is slightly lower than the other side. It is a very risqué type of style and will provide you with a lot of double-take looks. Initially, it looks like a messy style until people notice that your hair is actually very symmetrical.
If your hair is messed up along with the lopsided mustache style, people would just assume that you didn’t know what you’re doing.
Rugged Thick Handlebar Mustache
If you already have a thick beard, this style would work well for you. It does not require long stringy ends. Nevertheless, you need that the mustache protrudes over the top of your beard as a unit. Combining this style with a Caesar type haircut would work very well for you
Thick and Leveled
This type of handlebar requires that you grow your mustache in a very thick fashion. You do need to be careful while eating if you’re sporting this type of handlebar because food particles can easily become trapped within it.
How long does it take to grow a handlebar mustache?
It takes about 3 months to grow an adequate handlebar mustache.
The first phase is the stubble stage. This phrase is also the itchiest. Nevertheless, do not be tempted to trim it because this discomfort will go away with time. After 6 to 8 weeks, when you will have developed an adolescent handlebar.
Can you use a curling iron to shape your mustache?
Since some curling irons can heat up to 425 degrees Fahrenheit, I would avoid using them on your beard or your mustache. Also, a curling iron may cause your whiskers to straightened out if you overheat them, which will make maintaining a twisted handlebar almost impossible.
How to trim your Handlebar Mustache
To trim your handlebar mustache, it is best to use specialized beard scissors since they are designed to cut through whiskers. Hold the scissors in a vertical fashion, and cut the ends of the whiskers that need to be trimmed. I recommend the 5 inch scissors by Suvorna (link to Amazon).
Once you have cut a few of the whiskers, pull your comb through your whiskers to ensure that the length is correct and that the mustache seems to be correctly shaped.
For the final shaping after you have trimmed your mustache, use your scissors in a horizontal fashion and trim in a straight line following the contour of your upper lip.
I personally trim my mustache every two days because it has the tendency to curl into my mouth when it is too long.
Good luck with your goal to develop your own handlebar mustache. Just remember to have patience and you should succeed. Also, it is normal for a few whiskers to fall out.
If this happens to you, do not be discouraged. It is normal and it will not affect the overall look of your handlebar since if you continue to nurture it, it will regain its fullness.
Besides adequately trimming your handlebar, I thought that you would find it useful to know about a few of the important ingredients that are contained in beard wax that I found interesting.
Lanolin
Some beard waxes contain lanolin. What is lanolin, you’re probably asking yourself right now. It’s a very specialized substance because it comes from sheep’s wool.
This is beneficial to sheep because it protects their body from harsh rainy weather since it is a moisture sealant. Just in case i add substances to my beard or mustache that could play havoc with the moisture level of the skin underneath my beard and mustache.
I did find another interesting use of the lanolin besides just for beard wax that I thought I would mention here to prove its effectiveness. Some products were designed for the prevention of chapped lips use this ingredient, which to me proves that it’s not going to harm the skin underneath your beard and mustache.
Eucalyptus Oil
The majority of beard waxes contain eucalyptus oil. This essential oil is great because it has antibacterial properties. Since whiskers can trap food particles, you may be dealing with bacteria from time to time.
If you use this oil, you prevent the eruption of tiny white pimples that can form if bacteria get into the whisker follicles on your beard and mustache.
Another property of eucalyptus oil is as a deodorant. I’m not saying that your beard is terribly smelly or that your mustache stinks but it is possible, and natural oil would be great if it could prevent any smelliness.
Now that you are hopefully convinced about the importance of beard oil, I wanted to stress that you need to buy a high-quality comb.
The material of the comb
If you wish to purchase a comb that’s not going to break the bank, i guess you could purchase one that’s under $5. Personally, I prefer a wooden comb because of its overall style and quality. I will explain to you why this is true.
You may be saving $15 or so if you purchase a plastic comb; however, you could end up damaging your handlebar mustache. You will have to deal with the cheap microscopic jagged edges of the teeth of the comb that were created by machinery.
Personally, I would not like to have a comb, which has cheap construction, pulling its way through my mustache and possibly scratching my face.
If you are creating microscopic scratches on the skin of your face, you’ll have to worry about the possibility of having bacteria or a fungus on your face that will cause an infection or pimples.
Also, I have noticed that if you use a plastic comb on your beard and mustache, there tends to be added static electricity that is going to alter the over style of your mustache, and especially the handlebars.
Good luck with the development of your handle mustache. I know that you will be pleased with the end result.
Found this post helpful? Don’t forget to share on Pinterest!
